Tuesday, March 6, 2012

A Hummus Night

Pin It

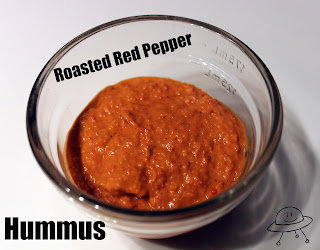
Tonight was a night for making hummus. I have a fun and exciting new recipe that calls for it that I'm making tomorrow. And of course I waited until the last minute to make it. :) I made both a plain hummus and a roasted red pepper spicy hummus!

The thing with hummus is that the flavors you can make are endless. So if you know how to make a basic hummus, you can adjust it from there. Don't be scared, hummus is actually pretty easy. And a lot of it is your own taste. These are suggestions for amounts, but play with it and add/subtract to make it how you want it.

Basic Hummus

Ingredients:
1 Can Chick Peas (mine are usually 16 oz)
2 Tablespoons Tahini
4 Cloves garlic, minced
2 Tablespoons Lemon juice
1/4 Teaspoon sea salt
1/4 Teaspoon Red Pepper Flakes
1 Tablespoon Cumin
2 Tablespoons Olive Oil
2 Tablespoons water

Mix all of the ingredients together in your food processor and blend very well. Depending on how good your food processor is, this could take a few minutes. If you want the hummus to be thinner, then add a little more water. Now, it's ready to eat.

Now, for the next recipe. As you'll notice, other than adding ingredients, the only difference is in the amount of liquids and garlic. For a basic hummus I add more garlic to give it extra flavor. Also, when you're using something (such as roasted red peppers), they contain a lot of liquid within them and so you don't need to add as much liquid to the hummus mixture. Okay, here we go.

Spicy Roasted Red Pepper Hummus


1 Can Chick Peas
3/4 Tablespoon Red Pepper Flakes (as I've said before, we like hot! Use less if you don't or none!)
2 Tablespoons Tahini 
2 Cloves garlic, minced
1 1/2 Tablespoons Lemon juice
1/4 Teaspoon sea salt
1 Tablespoon Cumin
2 Tablespoons Olive Oil
2 Roasted Red Peppers (there are only two in the jars that I buy)
Put all of the ingredients into your food processor and (like above), process until very smooth. 


Check your consistency and if you're happy with it then you're ready to go! Enjoy!


Pin It

Chicken Tortilla Soup

Pin It


This recipe has become a regular (and favorite) in our household. I love that he loves it because it is super easy! Who doesn't love crock pot recipes where you can just dump ingredients in and walk away??!!

Ingredients:
2-3 Chicken Breasts (2 big ones is plenty!)
1 can black beans (drained and rinsed)
1 can Kidney beans (drained and rinsed)
1 can corn (drained and rinsed)
1 can diced tomatoes (drained and rinsed)
1-2 jalapenos, diced
1 large red onion, diced
3 garlic cloves, diced
2 (14 oz) cans chicken broth (add one if you like more broth for your soup!)
Seasoning:
1/4 tsp dried oregano
1/4 tsp garlic powder
1/4 tsp sea salt
1/4 tsp onion powder
1/2 tsp red pepper flakes
1/2 tsp paprika
1/2 tsp cayenne powder (optional)
1 tsp ground pepper
2 1/2 tsp chili powder
2 tsp cumin
Toppings: (all are optional, get what you want!)
Cilantro
Green onions
Sour cream
Shredded cheddar cheese
Lime
Tortilla chips


Now comes the easy part. Mix together (in crock pot) the beans, tomatoes, jalapenos, onion, garlic, corn, and chicken broth. Stir in the seasoning next. Then just toss the chicken breasts in on top. 

Put the lid on, set crock pot to low and walk away for 8 hours. If you need it quicker, it will cook in about 6 hours on high. 

A few minutes before you're going to eat, chop up your cilantro and green onions for the toppings. Also, slice your lime! 


The chicken breasts should be falling apart, go ahead and shred them up completely


  Now, the good part! :) Fill your bowl with soup and top with cheddar cheese, onions, cilantro, and sour cream. Then take a slice of lime and squeeze it over the top. If you want, you may also serve with tortilla chips. A lot of people do, we personally don't in an effort to keep it slightly healthier. Enjoy!


Pin It

Friday, February 24, 2012

Crochet Dish Cloths

Pin It


My current obsession is back to making dish cloths. They're so simple that you don't even need to have a pattern, just start crocheting your favorite pattern and go until you have a square. Or, you can follow the current pattern that I've been using to make myself some. Yes, they're just for me. :)

Here are the details of what I used to make a wash cloth that is approximately 7.5" square:
*Size I 5.5 mm needle
*Lily Sugar 'n Cream Yarn in color of your choice (I like to make them in two different coordinating colors)

You can use another type of yarn obviously. Just make sure that it is 100% cotton. Anytime you're making dish cloths or wash cloths you need 100% cotton yarn.

Chain 32

Row 1: Half double crochet (hdc) in 2nd chain from hook and next 2 chains. Skip 1 chain. *hdc in next 3 chains. Skip 1 chain. Repeat from * to end of row.

Row 2: Chain 1. hdc in each stitch across the row (24) 
Row 3: Chain 2. Triple Crochet (tr) in each stitch across the row (24)


Row 4-13: Keep alternating Row 2 and Row 3 (5 times each)

Row 14 and 15: Chain 1. hdc in each stitch across (24)

Bind off work and sew in loose ends. There! You're finished, wasn't that quick?


Here are the finished dish cloths for our beach colored kitchen

If using them for a gift, I like to tie a piece of yarn around them for presentation. 


Pin It

Friday, February 3, 2012

Ribs...in a crock pot?

Pin It

The first time I heard someone mention cooking ribs in a crock pot I turned my nose up towards the roof and quickly turned away. Ribs! In a crock pot?! Gross, seriously? I don't think so.

But then I heard it again. And again. And finally one day I felt lazy and like taking a risk. I went to the market and came home with ribs, determined to prove my point that ribs made in a crock pot were not good. I was wrong. Completely wrong, so wrong that we didn't even have left overs. Wrong, wrong, wrong. Crock pot ribs are delicious and so simple!!! So be brave and give it a try! You will need:

1 Rack of baby back ribs
1 1/2 cups of BBQ sauce of your choice
2 Tbl paprika
2 Tbl garlic powder
1/4 tsp cayenne powder
2 Tbl brown sugar
1/4 tsp sea salt
1/4 tsp black pepper

First cut your ribs into 3-4 pieces so they'll fit into the crock pot.


Mix together everything but the BBQ sauce and the ribs to make a rub. You could also use a pre made rub if you want to, for example I have a fabulous one my brother gave me. Otherwise, mix these spices together and rub all over your ribs.


I leaned my ribs against the side of the crock pot with the meat on the outside, but you can also just pile them on the bottom. Coat them with your BBQ sauce.

Turn the crock pot on low and go relax (or go to work!). Let them cook between 6-8 hours, I cooked mine for about 7. They'll be falling off of the bones and ready to eat!


Also, if you want you can put the ribs onto a foil lined baking sheet and coat more BBQ sauce onto them. Then throw them under the broiler for a few minutes to crisp them up more. I personally didn't do this because I couldn't wait to eat them!!! Make sure you grab an extra napkin.


Pin It

Monday, January 9, 2012

Making plain cabinets fun!

Pin It

One of the biggest things we've had to tackle in our new home is a lack of storage closets. We were spoiled previously by having a huge closet in the bathroom and hallway, along with nice sized ones in each room. We also had a good amount of cabinet space in our kitchen...considering that I have more kitchen stuff than most restaurants. :) We needed a quick and inexpensive fix, so I turned to shelving. Which can quickly get expensive so I decided to utilize Closetmaid pieces from Target and Lowe's. But they're sooooo boring and can look cheap with their cardboard backs. So I decided to freshen them up a little bit and add some color.

If you've used this type of shelving before (or any inexpensive "fake" wood shelving that you purchase and put together at home), you'll be familiar with the backing for it. It is a cardboard type material that you nail to the back of the unit. On one side it has a coating that is the same color as the shelving, the other side is unfinished and looks like cardboard. This is the side we want because the other is shiny and the paint won't stick to it.

I used a small 6" roller to do mine. I used left over paint that we had from painting accent walls, so it would tie in with the other rooms in the house.

  Now comes the easy part. Just paint the backing for the shelf with your roller. Depending on your paint, you may need two layers.


  Once your piece is painted, let it dry completely!

  Once it's dry, follow the instructions for attaching it to your unit. 


Once your back is attached, continue with installing the shelves in the unit


Now you have an inexpensive shelving unit that has a little fun to it! I bought the above piece at Target for $16 and had all the painting supplies and paint already. It's a fun way to bring some color into a room and it's extremely easy!

Pin It

We're Here! Kind of...

  As many of you know, we've been in the process of packing our home in coastal Virginia and moving to Tampa, Florida. Talk about hectic. Home made meals fixed with all fresh ingredients quickly turned into meals delivered in a paper bag. Talk about gross. :) The actual move/drive was pretty uneventful. There were a few melt downs by yours truly and fair amount of stress. We left a day late, as expected, and drove to South Carolina before calling it quits for the day. We left late the next morning and finally arrived in Florida late in the evening. We were able to find our new home (a.k.a. extended stay hotel) easily. It was, ummm, nice. Which is being nice. I can honestly say that I would prefer to never live in a tiny hotel room with a husband and two cats again. Ever. Never.

  But we survived. Which I believe means that we can survive anything. We loved Tampa from the first day, hello Gulf of Mexico! The uncomfortable living arrangements got us motivated to quickly begin the search for a new home. It was frustrating at first when we couldn't find a place that was perfect and encountered issues getting realtors to call us back...but we kept going. And found an amazing place that we love! Just in time for Christmas. :) We quickly took on numerous house projects including painting and staining and got to work. Which was great, but put a hold on actually moving into the house. We've just recently finished our projects and are starting to get onto really unpacking and getting our house in order. Which means many, many more projects and countless trips to Lowe's and Target. They already know me by name.

  I'm ready to get back into projects and cooking! I've been going crazy on pinterest finding new recipes and projects. And attempting to work on some of my own. So stay tuned...I'm full of new ideas and energy! And I'm ready to get going again! 

Friday, December 2, 2011

Where Am I?

Our world has recently turned into one hectic stress machine. We found out the night before Thanksgiving that we are moving to Tampa...for sure, 100%. Oh, and by the way, you must be there and start work on the 12th of December. Fun activities have been put on hold, to be replaced by packing, temporary house searching, other moving activities and homework. Dinners have been getting served later and later each night, along with becoming easier. We leave here in less than a week and our house is far from packed. And I seem to have lost our floor. And counters.

I've worked on a few crochet projects, but mostly they are for gifts so I can't post information for fear that the gift receiver might see the photos and spoil the surprise. I started a fantastic red scarf in a basket weave that I was planning to use as a gift. That is until my husband began questioning who it was for and if it didn't have an owner he was willing to take it. Fantastic red scarf now belongs to equally fantastic husband. And they look fantastic together.

I did finish my new born dinosaur set for my younger brother & his wife. I'm still working on the set for older brother and his wife...even though I started it first. I'm not sure how these things happen. But it turned out precious an I was even able to find a teddy bear to model it. The cat said no.


  So, hopefully our move will proceed smoothly and we'll find a new home quickly. Until then my posts will be sparse and not very in depth! Now, back to playing with boxes...
Related Posts Plugin for WordPress, Blogger...